


Items Needed:
Polystyrene C Channel - Part # 262
https://evergreenscalemodels.com/col...tyrene-channel
0.030" Polystyrene Rod - Part # 210
https://evergreenscalemodels.com/col...30-75mm-od-rod
0.040 Polystyrene Rod - Part # 211
https://evergreenscalemodels.com/col...35-88mm-od-rod
Testors Liquid Cement for Plastic
Plastruct Plastic Weld Solvent Cement
A sharp modeling knife
320 grit sandpaper
Tweezers
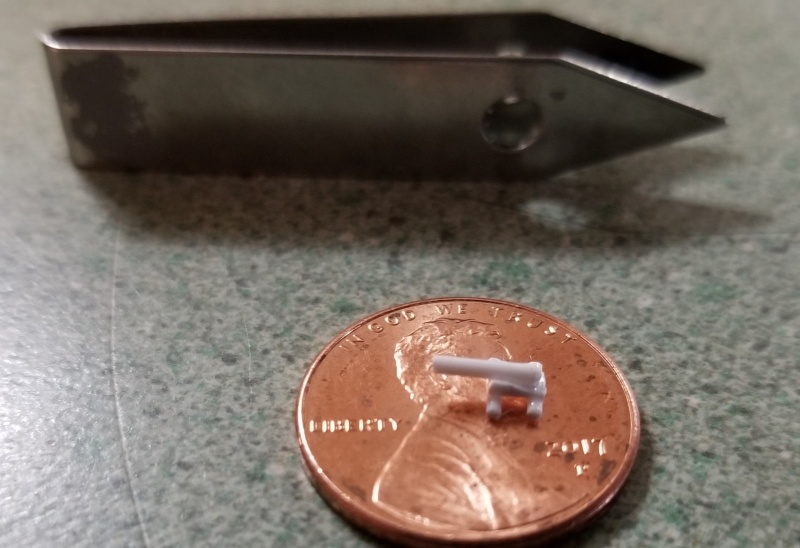
First, sand a bevel in the legs of the channel down to the floor of the channel. The bevel should be 2-3mm long.
Cut the beveled section plus about 1-2mm off the length of channel.
Now you have created the gun carriage.
All measurements are very subjective. Try to make a few carriages to develop a style you feel is satisfactory.
Next, take a length of 0.040 rod and sand the end to a rounded shape. This is the breech of the barrel.
When shaped to your satisfaction, swipe a few mm of the rod by the breech with the Testors cement. Wait 10-15 seconds for it to dissolve a bit. Press it into the carriage with the breech just shy of the beveled edge.
Allow this to dry.
Trim off two sections of 0.030" rod, roughly 20-30mm long. Place the first on your working surface. Holding the uncut barrel, position the carriage so the rod aligns with the carriage edge away from the bevel. Lightly touch the rod where it meets the carriage with the brush of the Plastruct. Since this is a wicking cement, it will bond very well.
Allow this to dry.
Repeat the previous step for the rear axle. The location of this axle is subjective. Try a few and go with what you like.
Allow this to dry.
Using your sharp modeling knife, trim the wheels and barrel to an aesthetically appealing length.
Don't sneeze. I spent several minutes on my hands and knees trying to find a dropped 32 pdr amongst the dust bunnies in my workshop.

 Reply With Quote
Bookmarks