Step 2) Getting ready
Before grabbing the knife, I find necessary to make some preparations.
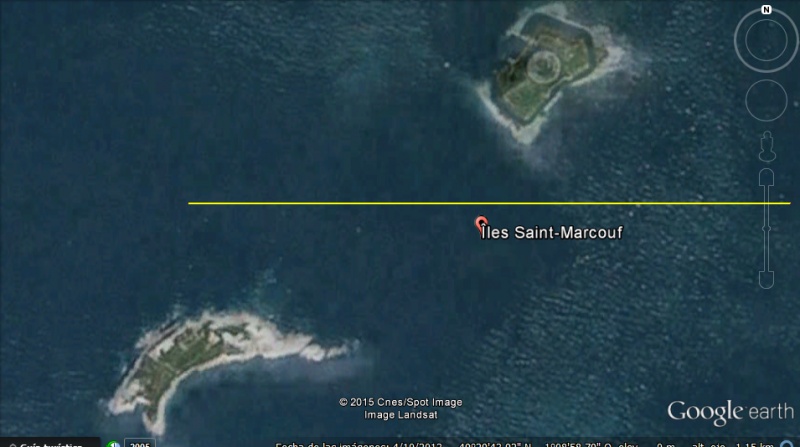
First, I decided which image to use as a plan for the island. In the end I chose to follow the satellite images available via Google Earth instead of closely following the drawings of the era for two reasons:
-Being able to measure the island using the proper tool in Google earth made it easier to determine actual size and makes it easier to scale the model. Some times it's really hard to figure out scale in old, hand drawn plans at low resolutions.
-It seems the water level has risen over the years, and Ille du Large is not really large anymore. Since I'm trying to keep my terrain as small as possible for gameplay purposes, I justified ignoring the age appropiate plans that show a bigger island and go with the smaller version.
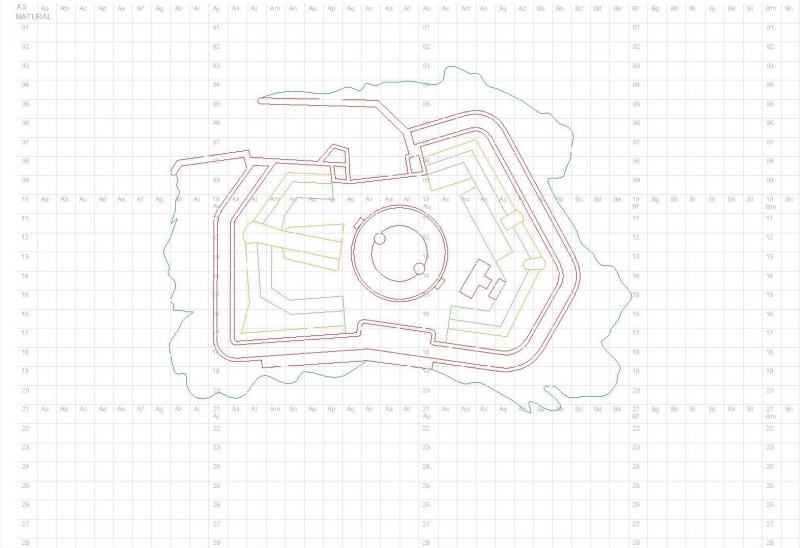
So I started drawing the outline of the terrain, the fortifications, and any other thing I considered important.
Then scaled it to 1:1000. I had tried with 1:2000 before, but it looked so wrong next to the 1:1000 ships that I decided to go with the proper scale and don't mess with any other option. Having ships raised half a centimeter by the base during gameplay doesn't do any favours to terrain in the right scale, but it is way worse if the terrain is smaller than it should!
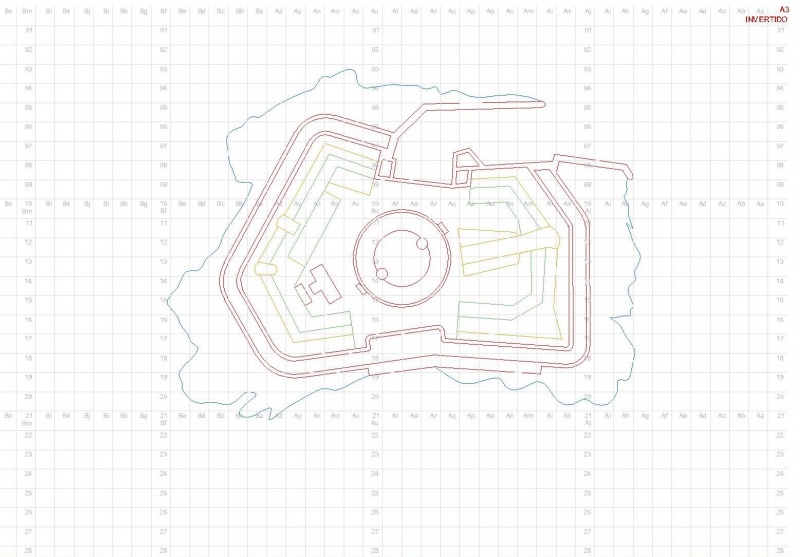
Finally, I printed plans of the islands with a grid of one centimeter. The regular plan will help me when trying to model and sculpt on top of the island, but I also printed a mirrored version of the plans which will be useful when I transfer the outline of the islands to polystyrene.
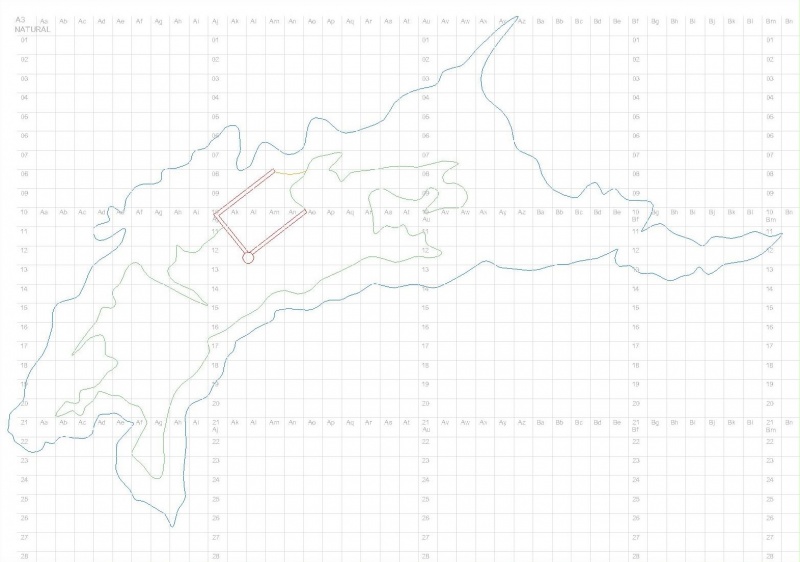
Since I am working with several centimeters thick struded polystyrene the angle at which the knife enters the polystyrene through one side can cause important deviations on the outline drawn on the opposite side. Therefore I wanted to draw the outline of the island in the side of the polystyrene which was going to be glued to the base I was using, as it shhould be the one closely resembling the outline of the island. Given that this drawing would end upside down glued to the base, I used the mirrored plan to make sure the actual island outline was not mirrored when not upside down.
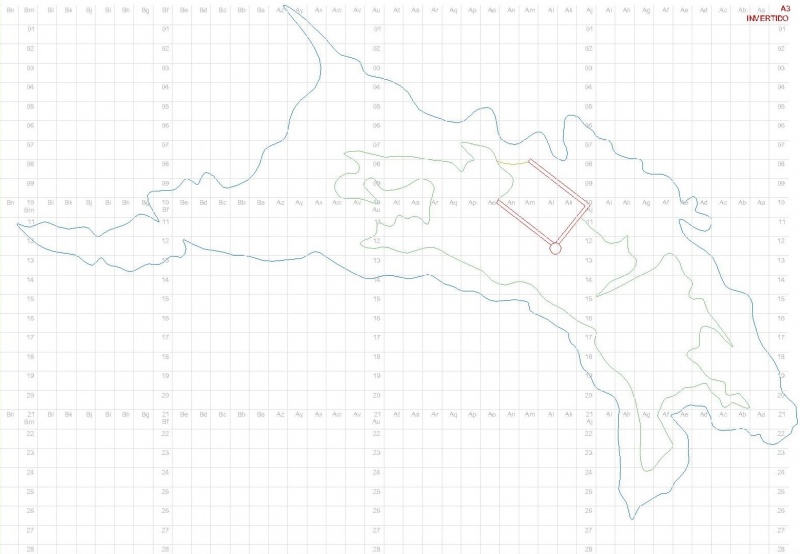
I first drew a grid equal to the one in the drawing in the polystyrene, labeled it, and used it as a reference for copying the outline of the plan, but there are many other ways to transfer a drawing into a polystyrene surface.
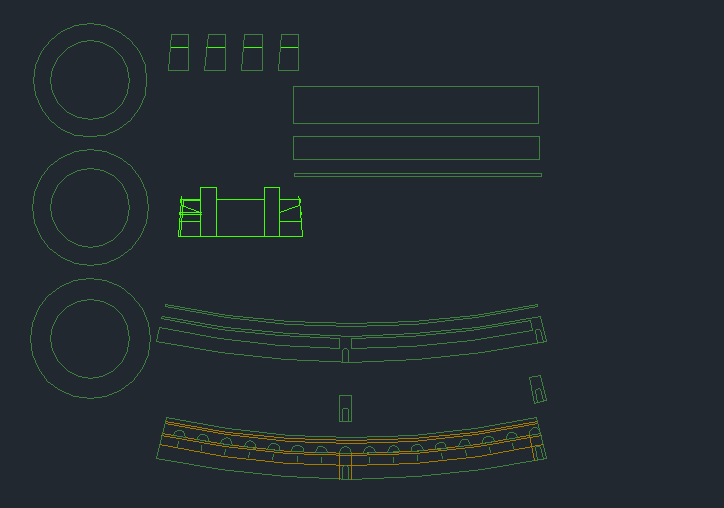
I also made templates with the shape of the cardboard pieces which would become the fortifications main building. I usually think about model buildings as onions, as I add layers of cardboard cut in shapes over previous layers to detail them.
Step 3) Obtaining the general shape of the island
Once I had the outline of the island clearly drawn into the polystyrene block, I cut the polystyrene in that shape. After I had removed any excess polystyrene, I also cut a piece of a plastic sheet in a similar shape a couple of centimeters bigger as a base using my new island-shaped polystyrene block as a reference. You may use any material you want as a base, as long as it doesn't change shape when wet.

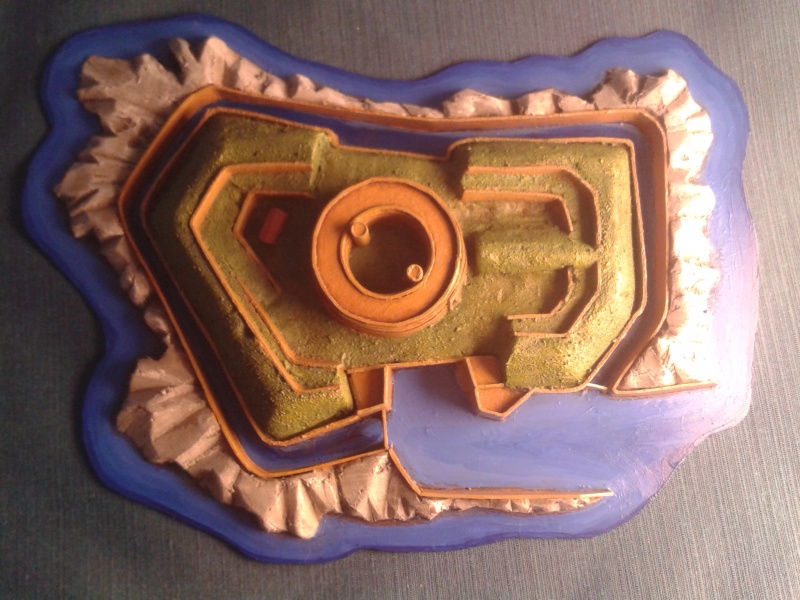
You can see here the outline of the island, beyond the moat, has been also given a sloped shape using a knife, in order for it to resemble a rocky shore. Within the moat, the main fort piece has had its outline cut, but work has not started yet on the hills and walls. The plastic base I used is clearly seen under both polystyrene pieces. The inner piece is not glued yet, but the outer one is glued to the base using pva glue, sine the vapours of superglue melt polystyrene.
I slowly went on with my knife, cutting small pieces of polystyrene away until I got a rough shape similar to the one I was aiming for.

You will notice I am greatly overemphasizing the vertical axis, as everything is taller than the real element its inspired by. I think it helps the terrain stand out in the playing field since, as ships in sails of glory sail 5 millimeters or so over the water due to their bases, realistically proportioned terrain might not look capable level of blocking line of sight to the batteries. Thats a personal stylistic choice you may probably disagree on, so feel free to keep realistic proportions.
And now, we go from a rough geometry to something resembling an island with a fort.
Step 4) Sanding and detailing
First, I started sanding the polystyrene surface to get softer edges. I did a light sanding on the rocks surrounding the fort, while heavily sanding the grass covered hills.

Then, I started cutting cardboard according to my templates to create the general shape of the main building of the fortress.

I added some details in layers of thinner cardboard to that building, and started cutting cardboard and gluing it to the polystyrene to simulate masonry walls.

You will notice I added some plastic cylinders from a plastic rod I found laying around to mimic the old cylindrical towers which, if I recall correctly, were destroyed in world war two.

Finally, our island is ready to get some texture and paint on it!
Step 5) Texturing, and painting
I first mixed some fine sand and watered down pva glue and applied it with an old brush on the areas covered in grass, to get some texture and cover any deep knife cuts which I could not sand away.
After it dried, I pproceeded to start painting right away with dollar shop acrylic paint. In retrospective, I should have applied some kind of imprimation layer (by brush if possible, since the gas from spray cans will also melt polystyrene) beforehand, since some paint started chipping away when I applied a final layer of very watered down brown paint to the whole model.
I found out grayish greens worked best as the base coat for grass. Then, I used a mix of green and yellow to dry brush the grassy areas and have the texture stand out a bit more.
For the masonry, I went with a darker, brownish yellow instead of the grey of the actual fortification for no real reason other than I didn't want it to stand out TOO much in the battlefield I started with darker colors on the ground and recesses and went with lighter tones as I went up. The color choice for masonry is one of the things I feel I might regret the most.
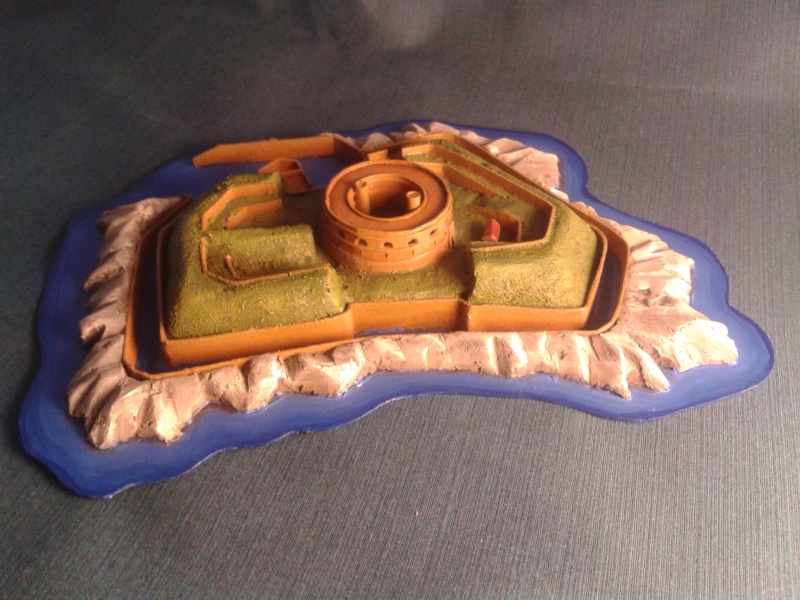
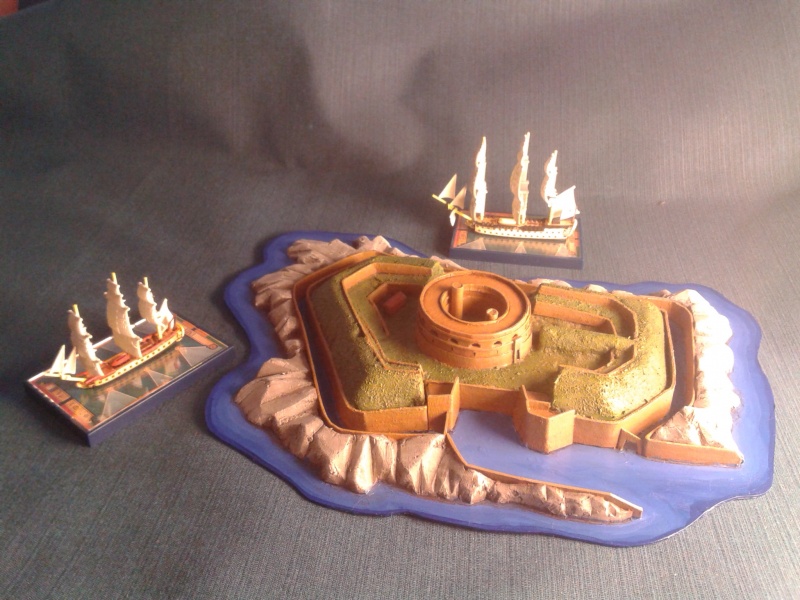
In the end, everything was covered by a very light brown ink. Here you can see the finished piece:


 Reply With Quote
Bookmarks